Saturday, July 17, 2010

Remote Assistance Instructions

Remote Assistance allows a person that is experiencing computer problems, a novice, to invite a trusted person, an expert, to remotely and interactively assist that person with a problem. Both computers must have Windows XP and be connected to the Internet.  Both the novice and the expert must be sitting at their computers.  Establishing a Remote Assistance Invitation behind a firewall might require you to make a network configuration change to open TCP Port 3389.

To send a Remote Assistance Invitation

To send out a request for help/support, to send an Invitation for Remote Assistance, select from the Windows Start menu, Programs/Remote Assistance.  This starts up the Windows XP Help and Support Center/Remote Assistance page.

There are three methods to sending an invitation.  You can send an invitation via Microsoft Windows Messenger, via email using Microsoft Outlook Express, or via saving an invitation as a file on a shared folder on the network, thus allowing you to use other email programs.  Select the method you want to use.

Enter your name and define how long the invitation stays open, then click Continue.

For security, it is highly recommended for you to define a password, which must be used by the expert recipient to connect to your novice system.

It is your job to advise the expert of the password, either by email or phone.

When selecting 'Save Invitation', you will be asked to define the location to save the file.  (For example, to My Documents).

Remote Assistance gives you a few last instructions.  The instructions notify the novice the Invitation has been saved successfully and where it has been saved.  It tells the novice to send the Invitation to the assistant by email or place it in a shared folder.  It also instructs the novice to tell the assistant to open the Invitation in order to start the Remote Assistance session.  It further instructs the novice, that if the Invitation is accepted, the novice will be notified that the recipient is ready to connect to their computer.

Click Send Invitation.

If you have a problem sending the Invitation

Verify that Remote Assistance is enabled.  In Control Panel, select the System icon or right click My Computer and select Properties.

Select the Remote Tab.

By default, Remote Assistance is activated.  Check the Advanced settings.  (Note:  the other option on this tab, Remote Desktop, is NOT available for Windows XP Home Edition.)

Define whether you allow the expert only to view your activities or whether the expert can also take control, i.e., use his mouse and keyboard to operate the system.

Define the maximum amount of time the Invitation can remain open.

Important note:  While waiting for the expert to connect, make sure your TCP/IP address does NOT change!  Do NOT terminate your connection, or when you reconnect you might get another IP address and your invitation is invalid. 

To respond to a Remote Assistance Invitation sent from a novice

Once the expert has received the Invitation on the remote Windows XP system, double-click on the Invitation file, which opens the Remote Assistance window.  If a password was defined, enter it now.  Continue with YES.  

Your system is then connecting to the novice system.  Once an expert connects to a novice system, a confirmation message is displayed.  The novice must click on YES to allow the expert to continue and to view the novice system. The expert will then see the novice windows of Remote Assistance.

After the Remote Assistance connection is established, the novice will see a User Console and the expert will see a Helper Console.

The User Console allows you to chat via keyboard... type under 'Message Entry' or via 'Start Talking', if both the novice and the expert are equipped with a sound-card with speakers and a microphone. 

If allowed in the settings of the invitation, the expert can take control of the system of the novice by selecting the Toolbar 'Take Control' on the Helper Console.  

When the expert clicks 'Take Control', a message will pop-up on the screen of the novice informing about the request. 

If you agree to this request, accept it by clicking 'Yes'

Once the 'novice' accepts the request, a message will pop-up on the 'expert' system to advise about having control and to press Esc or any key sequence or combination including the Esc-key to return control to the 'novice'.

The section 'Chat History' of the User Console will show that control has been taken by the 'expert'.
The 'expert' now uses the mouse and/or keyboard of the expert system to operate the novice system to identify the problem, checking for example, the Control Panel, Device Manager, Event Log.

To terminate a 'Remote Assistance' connection, both the expert and the novice can select in their Console section to 'Disconnect'.
The expert will be informed about the disconnection from the system of the novice.
Enhanced by Zemanta

File Recovery

Free software for file recovery can be found here:  Pandora Recovery - Free software

CNET also has a free app called Tech Tracker that will tell you when the software is out of date and lets you download an update.  You can also choose to be emailed when there is an update to Pandora Recovery.  What's better than that!


Enhanced by Zemanta

Saturday, June 26, 2010

Rollback a device driver

You have downloaded and installed the latest version of a video card driver for your computer.
Afterwards, you find your Windows XP Professional operating system seems unstable. You need to restore the original version of the device driver.

Open the System applet in Control Panel, and roll back the device driver.  
Device drive rollback allows you to restore a previous version of an updated device driver. Driver rollback affects only the changed hardware device. No other hardware or software on the computer is affected.


Navigate to the Hardware tab, and click Device Manager.  
From Device Manager, select the affected hardware device and click Properties.  
From the Properties dialog box, navigate to the Driver tab and click Roll Back Driver.

You can also open the System Restore utility, and load a restore point from a date before you installed the defective device driver.  System restore points are stored in the C:\Windows\system32\restore directory. 
To access System Restore, click Programs/Accessories/System Tools/System Restore


Using Windows XP, How to Roll Back a Device Driver


Enhanced by Zemanta

Friday, June 18, 2010

Steps to take to Increase Windows XP Performance

Windows Task Manager (performance)Image by KushalHada via Flickr


You are running several applications at once in Windows XP, and performance starts to slow down.  What can you do to improve the response time without turning off the computer?

Answer:  Increase the size of the PAGEFILE.SYS.

The virtual memory page file is PAGEFILE.SYS, in Windows XP.  PAGEFILE.SYS is used as a temporary storage area for data when main memory capacity is exceeded.

Increasing the size of this file increases the available storage area and improves system performance.  To change the size of PAGEFILE.SYS, go to the START button.  Click on SETTINGS, CONTROL PANEL, SYSTEM, ADVANCED, PERFORMANCE, OPTIONS, CHANGE. Select the Drive list, and click the drive that contains the paging file you want to change.  Under Paging file size for the selected drive, type a new paging file size in megabytes in the Initial size (MB) or Maximum size (MB) box, then click Set.  The optimal paging file settings allow Windows to manage the paging file size.

Steps To Take to Increase Windows XP Performance

Enhanced by Zemanta

Wednesday, June 9, 2010

SCSI Termination

You have both internal and external devices on a SCSI chain.  All devices are Fast SCSI-2 devices.  How should you place terminators for the SCSI bus?

Answer:  Place an active terminator on both end devices on the chain.  Active terminators are required for Fast or Wide SCSI, according to SCSI-2 specification.  Each end of the SCSI bus must be terminated.

SCSI Termination Tutorial
Enhanced by Zemanta

Tuesday, June 8, 2010

Network Troubleshooting

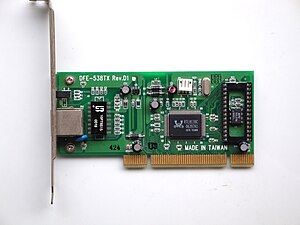
Ethernet card on RTL8139C controller. This is ...Image via Wikipedia
A user is unable to connect to a file server on your 10BaseT network (twisted pair Ethernet), although he is able to connect to folders on other computers.  A single hub exists on the network.  10BaseT Twisted Pair Ethernet  What hardware problems should you investigate?

Answer:  Either a defective network interface card (NIC) on the file server or a defective hub port connected to the file server would prevent users from connecting to the file server.  A defective cable between the file server and the hub would prevent communications between users and the server.  Client/server communication problems can also be related to software issues.  The user may not have permission to access the file server, or the user may not have the correct name or address of the file server.  If the network has multiple subnets, problems could occur because of incorrect subnet mask settings or incorrect gateway address
Advanced Network Adapter troubleshooting for Windows workstations
Enhanced by Zemanta

Tuesday, May 11, 2010

Startup Phases for X86 Windows Systems

Troubleshooting Startup

Startup Phases for x86-based Systems


The Windows XP Professional startup process closely resembles that of Microsoft® Windows NT® version 4.0 and Microsoft® Windows® 2000, but significantly differs from Microsoft® MSDOS®, Microsoft® Windows® 95, Microsoft® Windows® 98, and Microsoft® Windows® Millennium Edition (Windows Me).

All computers running Windows XP Professional share the same startup sequence:


Power-on self test (POST) phase


Initial startup phase


Boot loader phase


Detect and configure hardware phase


Kernel loading phase


Logon phase


The preceding startup sequence applies to systems started or restarted after a normal shutdown, and does not apply when you bring your computer out of hibernation or standby.

Cabling

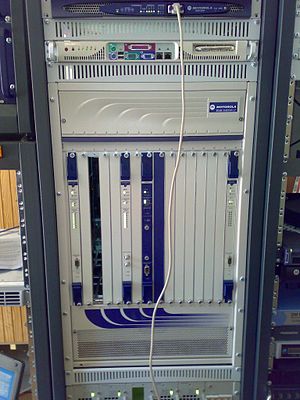
Cable Modem Termination System by MotorolaImage via Wikipedia
Network Cable Types
Enhanced by Zemanta

Sunday, May 9, 2010

Installing a Second IDE Hard Drive

Motherboard Form Factors and Components

Motherboard Components

Expansion Buses, IRQs, DMAs, Ultra DMA, Bus Mastering

Expansion Buses

RAID and SCSI drives

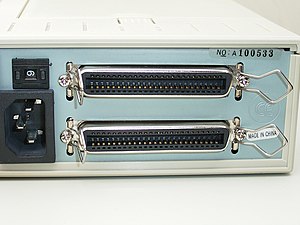
Two SCSI connectors.Image via Wikipedia
RAID and SCSI

Linux High Performance SCSI and RAID

How the Bubble/InkJet Printer Works

How a Laser Printer Works


Cleaning - The Rubber Blade removes any excess toner that drops into the debris cavity. The eraser lamp removes any excess charge off the photosensitive drum. This leaves the drum with a charge of 0 Volts.

Conditioning - The primary cornea (High Voltage Wire) adds a negative charge of around -600 volts to - 1000 volts.

Writing - The laser light hits the photosensitive drum, and dissipates the negative charge to the centre of the drum which is grounded. This leaves sections of the drum with a voltage of -100 volts.

Developing - The drum rolls through a supply of negativly charged toner particles (Particles are -200 Volts to -500 Volts).

Where the drum hasn’t been touched by the laser light, a lower negative charge is still there, so the particles are not attracted to this section of the photosensitive drum.

Transfer - A strong positive charge is applied the the paper, the particles of toner are attracted to the paper.

Fusing - The toner that is on the paper is heated and pressurixed, the toner becomes bonded to the paper.

The Toner Cartridge (or EP-Electro-Photographic) contains the photosensitive drum, Cleaning blade, and primary corona wire. The transfer corona wire is located on the printer itself.


Typical Maintenance kit includes:

Paper pickup rollers

Fuser

Transfer Roller