
Windows Server 2008 has an additional role installed called Windows Server Backup (WSB). Backup consists of a Microsoft Management Console (MMC) snap-in, command-line tools, and Windows PowerShell cmdlets.
- You can protect the entire server without using a separate backup and recovery technology
- Backup entire server or selected volumes
- Use wizards, tools, and the Complete PC Restore feature to assist in recovering a server
- Full support for Volume Shadow Copy service (VSS)
- Easier to restore to a point in time
- Can use Backup to provide application recovery
- Improved scheduling utility
- Better remote administration both from the GUI and through Windows PowerShell
Direct backup to tape is no longer supported and we now have to use network locations or DVD, removable media, or local storage.
You can use the Ntbackup.exe tool to mount tapes from previous backup versions in Windows Server 2000 and Windows Server 2003. However, you can not use it to create new backups on Windows Server 2008.
Permissions

- Administrators
- Server Operators
- Backup Operators
To increase
security:
- Custom groups that separate the backup and restore User Rights Assignments
- Limit the number of users that belong to the default groups having backup and restore rights
Windows
Server 2008 and Windows Server 2008 R2
Question: You have a network configured as a single Active Directory domain. All of your domain controllers run Windows Server 2008 R2. Several objects were accidentally deleted from Active Directory Domain Services. You need to recover the objects as quickly as possible. What is the first thing you should do in your recovery process?
Answer: Restart one domain controller in the Directory Services Restore Mode (DSRM). Then, perform an authoritative restore of the deleted objects. DSRM is used on a Microsoft Windows Domain Controller to take Active Directory offline. There is no reason to take all domain controllers offline and this would interfere with network operations.

What is System State Data?
Windows Server 2008 does not backup and
recover system state data by the same method as servers that run
Windows Server 2003 or Windows Server 2000. Windows Server 2008 requires a backup of
critical volumes rather than only backing up system state data.
The system components making up system
state data depend on the server roles installed; the volumes that
host the critical files the operating system and installed roles use.
For example, if the machine is a domain controller, only the SYSVOL is
backed up.
| Component | When is component included in System State? |
| Registry | Always |
| Com+ and Class Registration database | Always |
| Boot files, including system files | Always |
| Active Directory Certificate Services database | If it is a Certificate Services server |
| Active Directory Domain Services database | If it is a domain |
| SYSVOL directory | Only if a domain controller |
| Cluster service information | If it is in a cluster |
| IIS Metadirectory | If installed |
| System files under Windows Resource Protection | Always |
Optimizing Backup Performance
Windows Server Backup (WSB) performs a block level backup by
writing to a virtual hard disk. That optimizes and increases
performance, even if performing full backups on a constant basis.
You can choose one of the following
settings available under the Configure Performance Settings option
in the Actions pane of the Windows Server Backup:
- Always perform full backup. Slows down the backup speed, but does not impact performance.
- Always perform incremental backup. Increases backup speed, but does not impact performance.
- Custom. You can configure each volume separately for full backup or incremental backup.

How is Data Restored?
The restore utility launches a wizard
and must be installed by using the Initial Configuration Wizard or the
Server Manager tool.
After data has been successfully backed
up, you can use the Windows Server Backup Recover option in the
Actions pane to recover volumes, folder, and files located on the
local server, or a different server that you can connect to remotely.
Because we are using a block-level backup, in the back ground the virtual hard drive is mounted. We step
through the wizard to restore data back to the server.
Backup and Recovery
Specify a Backup Time
You can use the Backup Schedule Wizard
located in the Windows Server Backup Actions pane to create a backup
schedule. You have the ability to specify options and can backup the
entire server or specific volumes only. You can schedule backups when
you wish.
Demo – Installing an Configuring Windows Server Backup
- Start | Administrative Tools | Server Manager
- Highlight Features
- In the details pane, click on Add Features
- Check off the Window Server Backup Features
- Underneath Window Server Backup Features,you have:
- Windows Server Backup
- Command-line Tools (if you want command-line, you will also need Windows PowerShell. If you select Command-line, a dialog box pops-up giving you the option of installing the Windows PowerShell feature). In this example, we will add Windows PowerShell feature.
- Click Next
- Click Install
- Click Close
- Close Server Manager
- Go to Start | Administrative Tools | Windows Server Backup
- The Volume Shadow Copy Service (VSS) is a built-in Windows mechanism that provides iterative (successive) versions of data. It provides a snapshot at a point-in-time.
- Shadow copies can be used to:
- Recover files
- Review, save, or copy previous versions of files
- Enabled per volume
- Not a replacement for your regular backups
- Shadow copies are allocated storage limits versions
Answer: Right click the Shared Folders in Computer Management, click All Tasks, and click Configure Shadow Copies. Go to the volume where the shared folders are located. Select Enable to enable shadow copies.
Note that shadow copies maintain a maximum of 64 copies of a file. The copy schedule affects the amount of time that the oldest copies are deleted. Microsoft recommends writing shadow copies to a different volume on a different drive that the shared folders.

Shadow Copy Scheduling
The default schedule is 7:00 A.M.
and noon each day.
Create a shadow copy schedule based on:
- Volume of changes
- Importance of changes
- Storage limitations
Demo – Configure Shadow Copies (Server side)

- Go to Windows Explorer
- Right-click the D drive
- Select Properties
- Click on the Shadow Copies tab
- You will see the D drive highlighted. Choose Settings
- You can change the Storage area for the actual shadow copies.
- You can limit the size of the copy Use limit:
- You can change the Schedule.
- Click OK
- Click OK
- Highlight the disk and you will see the Enable tab is greyed out to mean the shadow copy is now enabled
- If you want to perform a shadow copy now, click the Create Now button
- Click OK
Shadow Copies from the Client side
- Windows XP and Windows 2000 Client computers must have the Previous Versions client installed (Windows 7, Vista and XP SP2+3)
- Clients must use the share path to an object to show the Previous Versions tab (navigate to the share path and right-click on the file to see the Previous Versions option)
- Shadow Copies do not replace regular backups
Note: if you have an older version
of Windows XP or Windows 2000 SP3 or SP4, then you need a file called
TWClient.msi. This can be found in the client’s directory of the
Windows 2003 Server installation or downloaded free from Microsoft.
This will allow the previous versions of the operating system to take
advantage of the shadow copy.
Demo - Restore Shadow Copies on a Vista client
- Start | Run
- Type: \\nyc-dc1\shadow and click OK
- The client goes to the server and opens a document called ShadowTest
- Open the document and modify it in some way and then save the document
- Go to the Date modified column and right-click
- Select Restore previous versions. Optionally, if you go to Properties, prior to selecting Restore previous versions, you can see the File versions: and you can Open, Copy..., or Restore the file
Providing Server and Service Availability
How do you protect your servers from
outages?
Fail-over clustering can be a great
solution to a mission-critical application. If you lose one node in a
cluster, then the passive node will fail-over and assume the
responsibilities of the failed node. The interruption to the
client/end-user is virtually un-noticeable. This allows you to repair
the cluster, and then fail the failed cluster node back again.
Network Load Balancing (NLB) has had
some significant enhancements in conjunction with ISA Server 2006.
NLB provides us with the ability to load-balance and give us
fault-tolerance with IP-based services, such as Web servers, Virtual
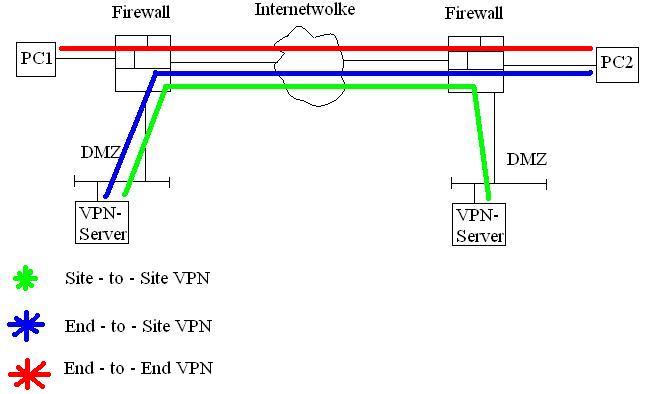
Private Networking (VPN), Streaming Media, Terminal Services, Proxy,
etc.
NLB Overview
When we install NLB as a network driver
on our member servers or the host within a cluster, the computer must have only TCP/IP on the adapter. Do not add any other protocols to the adapter, for example, IPX. NLB allows for the creation of a cluster containing up to 32 computers, called cluster hosts. The NLB drivers effectively partition the client space among the cluster hosts.
The client machine is only aware of the
virtual IP and does not know it is communicating with multiple
machines within the cluster. When the client initiates communication,
it does it to the virtual IP. All the nodes in the cluster share the
same virtual IP as well as their dedicated IP address. The client has
a mapping to one of the nodes within the cluster, and only that node
handles the client request and allows the request to propagate up to the TCP/IP protocol driver and eventually a server application. The other nodes within the NLB cluster drop that client’s request. If there is a failure in the NLB
cluster, then the client request is handled by one of the other nodes
within the NLB cluster. No new client requests are sent to the failed cluster host. Another host can be added to the cluster and will handle future client requests, seamlessly.
NLB is a Windows Server 2008 feature. Network Load Balancing is based on NDIS lightweight filter technology. Using NLB with Terminal Services offers increased availability,
scalability, and load-balancing performance.
Windows Internals Book
Windows Internals Book
Demo – Installing NLB
- Start | Administrative Tools | Server Manager
- Select Features
- In the details pane, select Add Features
- Check Network Load Balancing
- Click Next
- Select Install
- Click Close
Create NLB Cluster
There are three types of configuration:
- Host Parameters. Specify an id for each host in the NLB cluster. The host with the lowest numerical priority in the cluster, handles all of the network traffic not covered by a specific port rule. We can override the priorities by providing specific port ranges on the port rules tab.
- Cluster Parameters. This is where the IP address and subnet-mask is set up. The values have to be the same on all servers in the cluster. We also provide a full Internet name (FQDN) for the cluster. These parameters apply to a NLB cluster as a whole.
- Port Rules. Specify port rules to control traffic within the cluster. We can direct traffic to specific clusters within the array and we can set up filtering within the port-forwarding rules, in order to filter out certain types of traffic.
Note: You must be a member of the
Administrators group on the host you are configuring, or you must
have been delegated authority to use the NLB Manager. If you are
configuring a cluster or host by running the NLB Manager on a
computer that is not part of the cluster, you do not have to be an
Administrator on that computer.
Demo – Configure an NLB Cluster
(How to create a enable NLB, how we create an NLB cluster, and how to add hosts to the cluster)
- Start | Administrative Tools | Network Load Balancing Manager
- Highlight Network Load Balancing Clusters and right-click select New Cluster
- New Cluster: Connect dialog box displays
- In the Host: text box, type: nyc-svr1 and click Connect
- In the Interfaces available for configuring a new cluster section, choose Local Area Connection
- Click Next
- We can click Add to add multiple IP address, set the Priority, and set the Initial host state (Started, Stopped, Suspended)
- Click Next
- Then we choose a cluster IP address. This is the virtual IP address used for the cluster. Click Add.
- You can add an Ipv4 or Ipv6 address. We will use Ipv4, 192.168.2.200. When we click on Subnet mask:, it fills in the default classful subnet mask. (You might need to modify this, if you are not using classful IP addresses)
- Click OK
- Click Next
- In the next dialog box, enter the Full Internet name: for the NLB cluster. We will enter web1.woodgrovebank.com. We can use one of several Cluster operation mode:
- Unicast (we will use this)
- Multicast
- IGMP multicast
- Click Next
- The Port Rules dialog box displays for TCP and UDP traffic
- Select Finish
- After returning to the main dialog box, right click on the web1.woodgrovebank.com and select Add Host to Cluster.
- In the Host: text box,type: nyc.dc1 and click Connect
- Click Next
- Notice the priority is 2
- Click Next
- You can set up port rules if you need to. Click Finish
What is a Failover Cluster?
A failover cluster is a group of
independent computers that work together to increase availability of
applications and services. They are physically cabled together and
can be connected by software, also.
Improvements to Failover Clustering within Windows Server 2008
- Validation feature ensures system, storage, and network configuration is suitable for a cluster
- Support for globally unique identifier (GUID) partition table (GPT) disks in cluster storage
- Cluster setup improvements to the wizard
- Simplified configuration to manage the application interface
- Improved stability and security, resulting in increased availability
- Improved cluster communication with storage
- Improvements to networking and security
Hardware Requirements
- The additional hardware needed for Failover Clustering needs to be certified for use with Windows Server 2008
- Additional network adapters and cabling so that we can create our private network between the nodes of our cluster
- The operating system should be Windows Server 2008 Enterprise edition or later
- Device controllers or appropriate adapters for storage
- Storage
Best Practices
- Properly secure the NLB hosts and load-balanced applications.
- NLB does not provide additional security for the load-balanced hosts.
- You must protect the NLB subnet from intrusion
- Microsoft recommends two or more network adapters in each cluster when possible.
- If the cluster is operating in the default unicast mode, NLB is unable to distinguish between single adapters on each host.
- If you use two network adapters, as recommended, make sure you install Network Load Balancing on only one adapter.
- Use only the TCP/IP network protocol on the cluster adapter.
- Enable Network Load Balancing Manager logging:
- The Network Load Balancing Manager (NLBM) can be configured to log each NLBM event. Enable NLBM logging by clicking Log Settings in the NLBM Options menu. Select the Enable logging check box, and specify a name and location for the log file.
- The Network Load Balancing Manager log file must be properly secured, as it contains potentially sensitive info. By default, the log file inherits the directory’s security settings in which it is created, so you may need to change the permissions on the file to restrict read and write access to some individuals. Be aware the person using NLBM requires full control of the log file.
- Verify the load-balanced app is started on all cluster hosts where the app is installed:
- NLB does not start or stop applications
No comments:
Post a Comment
"Comment As:" anonymous if you would rather not sign into an account!